Tortoise Vérité - new
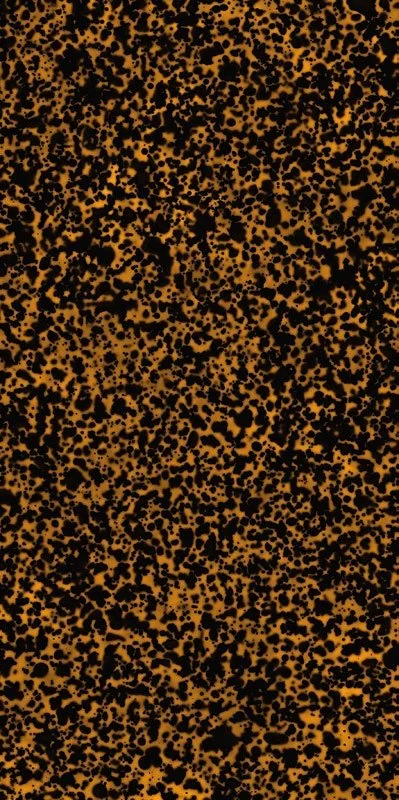
An ode to timeless glamour. Like the lacquered sheen of vintage eyewear and the polished elegance of heirloom accessories, Tortoise Vérité captures the poetry of pattern in motion. Each porcelain slab glows with layered amber, cognac, and espresso tones that shift under the light — a living surface that feels both retro and resplendent. Crafted through a modern cold-glazing technique, the collection reveals exquisite clarity and color depth, echoing the luxurious patina of hand-finished resin. Designed for walls that deserve attention, Tortoise Vérité transforms interiors into cinematic moments — where reflection, warmth, and artistry intertwine.


Products
DETAILS
Cold Glazing Porcelain Tile
24”x48”x6mm Nominal Size | 2 Pieces Per Box / 15.5sf Per Box / 45.96lb Per Box
48”x110”x6mm Nominal size | 36.17sf Per Slab / 107.38lb Per Slab
Rectified Edge
10 Random faces
Special Order 12-14 Weeks
APPLICATIONS
Wall
Interior
-
Cold glazing is a modern decorative technique that brings vivid color and remarkable image clarity to porcelain surfaces. Unlike traditional high-temperature glazing, which fuses a glass layer in the kiln, cold glazing applies advanced finishes and design layers after firing — allowing for extraordinary depth, gloss, and visual precision.
This process celebrates design freedom: richer chromatic tones, intricate details, and luminous surface effects once thought impossible in porcelain. The result is a collection of expressive slabs crafted for walls that command attention and interiors that feel curated, not manufactured.
While cold-glazed porcelain delivers unmatched beauty, it is intended primarily for wall and feature applications rather than high-traffic floors. The delicate surface requires gentle maintenance and care during installation — a small consideration for the artistry it brings to each space.
-
Storage: Keep slabs in a covered, dry area, protected from weather. Ensure stacks are capped/covered with protective end caps.
Aesthetic Characteristics: Minor variations or small imperfections are intrinsic to the decorative process and should be considered a feature, not a defect.
Surface Performance Note: The innovative decorative technique used enhances image clarity and color depth but results in lower abrasion resistance than traditional un-decorated porcelain stoneware. Always follow the usage guidance provided on packaging and in this guide.
-
Avoid contact with abrasive materials and prevent slab-to-slab rubbing or contact with sharp objects.
Do not set tools or other hard items directly on the decorative surface.
Fabrication (Cutting & Drilling)
Work Surface: Always cut on a perfectly flat, clean, debris-free table. Verify planarity with a spirit level.
Equipment: Use machines and tools suitable for porcelain stoneware.
Do not use an angle grinder for straight cuts.Cutting — By Format/Item Type
60×120 cm (24″×48″), 6 mm — Color Board items:
Make the cut from the front (decorative) face using professional porcelain cutting equipment.60×120 cm (24″×48″), 6 mm — Decorative items (e.g., patterned/graphic lines):
Make the cut from the rear (back) face using professional equipment.120×280 cm (48″×110″), 6 mm — All items (including Color Board and decorative lines):
Use a water-flexible cutter (guided water-feed system) with a high-performance 115 mm diamond blade; cut from the front (decorative) face.
Edge Finishing (all methods): After cutting, lightly chamfer edges with a diamond sponge, using smooth, controlled strokes from the front to the back to remove residue.
Drilling / Holes
Drill from the front (decorative) face using an angle grinder fitted with diamond-tipped hole saws/bits appropriate for porcelain.
Maintain stable support and avoid excessive pressure or heat buildup.
Installation & Grouting (Walls)
Leveling Systems: Do not use mechanical leveling spacers on these decorated slabs.
Joint Width: 1 mm joints are recommended.
Layout: Confirm the pattern/graphic sequence before installation.
Starter Course: Do not start at floor level. Begin the first course at least 4 mm above the finished floor, maintaining a 4 mm base gap.
Cut Piece Placement: Position cut slabs at the top of the wall when possible for best visual continuity.
Edge Protection: Mask slab edges with paper tape before grouting and/or painting.
Grouting
Use fine-grain cementitious grout only.
Apply with plastic trowels (avoid metal tools against the decorative face).
Tape Removal: Slowly remove masking tape within 30 minutes of grouting and/or painting. If two paint coats are required, replace tape between coats.
Cleanup: Before grout hardens, clean with water and a non-abrasive sponge to prevent residue that could affect the decoration. Avoid metal scrapers, cutters, or rigid spatulas on the face.
Sealants
Do not use acetic silicones (e.g., standard “acetoxy” silicones) for windows, showers, or sanitary joints.
Use neutral-cure silicone alternatives.
-
Clean with neutral pH detergents and/or water using a microfiber cloth or soft sponge.
Limescale removers (acid-based) may be used briefly; rinse thoroughly with water immediately after application.
Do not use: solvents (including alcohol), abrasive pads, scouring powders, or any product/tool that can scratch the surface